I am well on my way down my adventures in fermentation. What started as, "Dang-it, I have 6 apples that have gotten over ripe and I don't want them to go bad", manifested into an exciting and inspiring learning opportunity!Here in Alaska the fruit is very expensive. Apples are just about the cheapest fruit you can buy, and they are easily $3 (or more) per pound, so I try not to waste a bit (and buy them on sale). After making apple muffins, I had the skins and cores. This would normally get composted, but I decided to try Apple Scrap Vinegar. This opened a flood gate of ideas, and I have not looked back. Many (MANY) trips to the library (and the online library), and after reading every book they had on fermentation, my kitchen has become a bubbling, burping, fermentation adventure! *More posts to come*. I quickly began making Kombucha, and doing a second fermentation with fruit. Which naturally led me to fermenting the rinds and core of many fruits and drinking the sweet brine!
As mentioned before, apple scrap vinegar is made using "scrap". This can be done with so many fruits. The fermentation happens when the natural yeasts and bacteria on the skins of fruit are allowed to live happily in an environment where they can thrive.
One I have particularly enjoyed is fermented pineapple, in Mexico they call it Tepache. It is awesome served over ice, mixed with kombucha (or sun tea), or made into a spritzer. So, here we go -join me on another culinary adventure!
1 Pineapple
1 cup Brown Sugar
1/2 - 1 Gallon Un-Chlorinated Water
1 gallon jar or 2 1/2 gallon etc.
1. Put some warm water in the jar with 1 cup of brown sugar. If using 2 half gallon jars, put 1/2 cup in each jar. The jar size and amount of water is not an exact science. If you have a small pineapple, then use less water etc. Stir the water to dissolve the sugar.
2. Cut the skin off the pineapple. Leave an inch or so on the skin. I cut deep enough to remove the little dimples. Cut the skins into chunks and drop them into the jar. Compost the top and bottom.
3. Fill the remainder of the jar with water up to the shoulder of the jar, leaving the neck open as head space. This is important because it will bubble. Cover with a cloth and rubber band, or a canning jar lid loosely capped. The gasses that are released need to be able to escape.
4. Start checking the pineapple at 3 days. Taste until you like it. You can leave it up to 7 days. The longer it ferments, the stronger the ferment taste will be. So, taste testing is key, everyone's tastes are different.
5. At day 3 it will be bubbling.
6. As it ferments, it will begin to get a bit cloudy and there will be some white sediment on the bottom of the jar. This sediment is similar to the mother that settles in the bottom of apple cider vinegar.
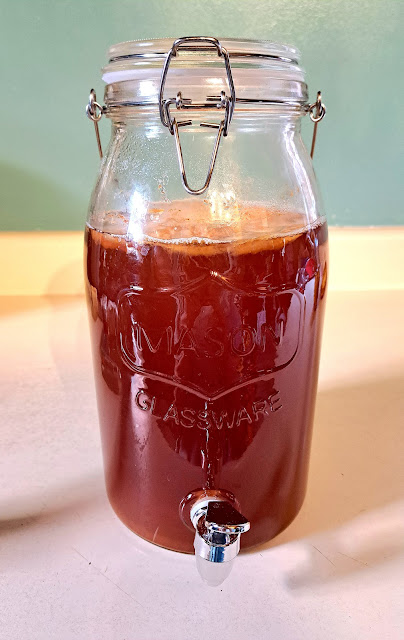
7. Once it tastes nice to you, strain the pineapple from the liquid.
8. The pineapple can be used again if you wish, I like the taste of the fresh pineapple. But I have reused the pineapple with other fruit to make a blend of fruits. Try out a lot of different things and find what you like.
9. Cap with a lid and refrigerate. I love mixing half and half with kombucha. You can add flavors, or mix with some lime soda. This stuff is wonderful and chock full of probiotics.
Enjoy! Please check out my other posts and experience something new.


Comments
Post a Comment